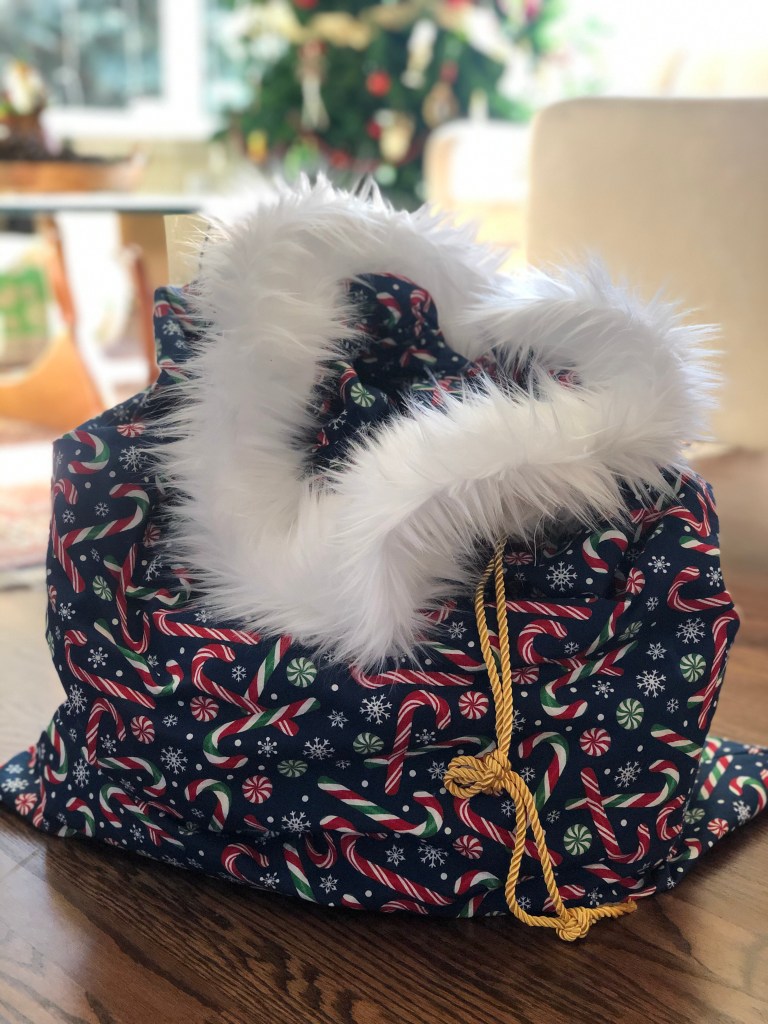
When I got married my mum made me a Santa Sack. She had one for our family, and felt that it would be a sweet tradition to hand down. This large bag held all the presents. It was magical to me growing up and I loved that she made me one. Fast forward to today and I still have, and use the Santa Sack she made me. This year, my husband announced he would like his own so that he might hide his presents for us. So I was commissioned to make one for him, with a faux-fur top and a gold rope – as per his specific demands :). This easy holiday tradition can be made in a day and can be embellished however you like! Have so much fun and Happy Holidays!
I purchased all my supplies online from fabric.com and amazon. You will need the following materials:
Materials Required
– 1 yard of Fabric (more if you want your bag to be taller or if you want to do a lining)
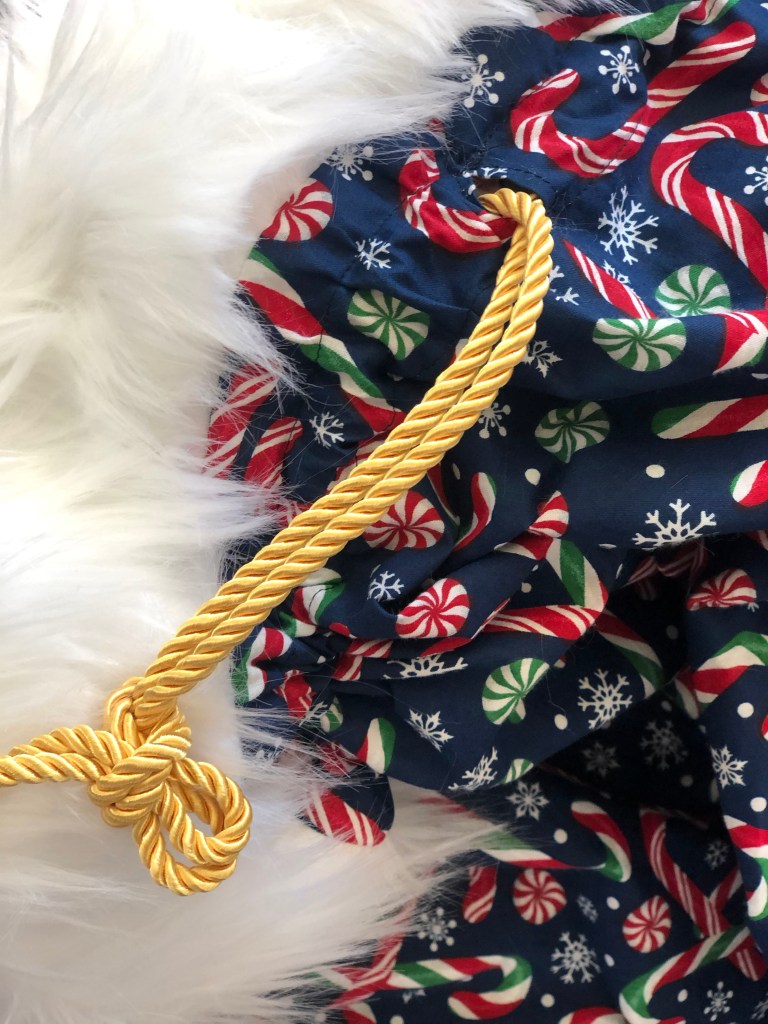
– 1 1/2 to 2 yards of ribbon or rope
– 1 yard Faux Fur or embellishment (optional)
– coordinating thread, safety pin, sewing machine, sewing supplies
Let’s Get Started!
1) Begin by cutting or trimming your fabric. For my husband’s version I used about a yard and a half (as he wanted his to be taller). I used the width of the bolt to determine the width of the bag. In this case the fabric was 54” wide, so with my seam allowance taken off I have ended up with 52.5” wide bag that I folded in half. Because my husband wanted his to be lined, I did this twice.
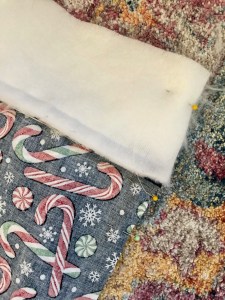
2) Cut your trim or embellishments to size. In my case, I cut the faux fur into two 4” pieces as I wanted the fur to be furry on both the inside and outside of the bag. My faux fur was 60” long, so it fit along the top of the bag in one easy piece. If your’s doesn’t, then you will have to join them.
3) Attach your trim to the top of the bag (right sides together RST). Make sure that your fabric pattern and the trim are going to be the way you want them to be – i.e. the fur I used goes in one direction, so I needed to make sure that when I laid it down on my fabric and sewed it that it would end up going in a downward direction when looking at the bag right side up. Hopefully this makes sense! I did this step twice, as I added a lining.
4) Fold your bag over (RST) and sew 5/8” seam allowance (SA) down the side and along the bottom. If you are doing a lining and embellishments on the top, be sure to leave an opening for your drawstring rope. I left about an inch. So I sewed down the side of the bag along the short end of the faux fur and an inch below it, then backstitched, then started again (with a backstitch) after leaving the inch open. Because you folded the bag in half, you only need to sew the one side and bottom. If you are doing a lining, repeat with the lining, however, do not leave an inch at the top for the drawstring, but leave an opening along the bottom (I left about 10”). This will enable you to sew the exterior and interior together and then have a hole to flip them out. You can finish your seams however you like. I cut mine down with pinking shears and then pressed them open as I was doing the lining, but you could serge or do a French seam. Be careful to leave space at the opening holes if you are trimming down your SA to allow room to stitch later.
If you are not doing a lining, start your stitching down the side but leave about 1-2” at the top to fold your fabric over twice for your rope channel. Be sure to backstitch when you start your stitching.
5) If you are doing your version with a lining, stitch a box about 1/8-1/4” around the 1” opening for the drawstring. This will help keep your stitches from pulling with repeated use and just looks more professional.
If you are not doing a lining or embellishing at the top, you will need to create a channel for your rope. Fold over your fabric at the top twice and press (leaving a 1/2” to 1” space to fit your cord/rope or ribbon). The dimensions will depend on your tying mechanism. Stitch along the edge of this to secure in place.
Final Assembly (Version without Lining)
6) If you are not doing a lining, you can now thread your rope along the channel. A safety pin attached to the one end of the rope will help you pull it through more easily. Give it a press and put the kettle on! You are done!
Final Assembly (Version with Lining)
6) For the lining version, place exterior into lining RST. Align the side seam and pin along the top. Sew along the top of the bag. Turn right side out through the opening in the lining.
7) Sew the lining opening closed by tucking in the raw edges and sewing along the edge or hand-stitching. It is on the inside, so no one will see! I find that my earlier pressing of the seams open helps me to get a close stitch along the edge.
8) Push the lining into the exterior. Give the bag a good press.
9) The final stage is to create the channel for your rope. You already have an opening on your exterior. Sew all around the bag just above and just below that opening, making sure that your channel will have enough room to fit your rope/tie/ribbon. Now attach a safety pin to your rope and pull it along the channel. I tied my rope together at the end so that it would not get pulled back through. As I was using nylon gold braid, I also dipped the ends in wax to keep them from fraying.
Voila! You are done!
Other ideas for your Santa Sack…
This could be a great gift bag too – as you can make it whatever size you want!
You can add embellishments at the end – hand-stitched elements around the top, different trims
Try a quilted version
Have a Happy and Safe Holiday Season!