

Skill Level: Medium Difficulty
Materials Required:
- Assorted scraps of fabric that when sewn together will measure two pieces of 18×12”
- Two pieces of lining fabric 18×12”
- Two pieces of batting 18×12”
- 6 1/2” x 15 1/2” rectangle of accent fabric
- A festive ribbon of your choosing (cut to 8” in length)
- Coordinating thread
- 1/4” foot (Bernina Foot #57)
- walking foot
- Free-motion quilting foot (optional)
- Pattern for a stocking shape that will fit into 18×12” (I attached three pieces of computer printer paper and drew out a stocking shape)
- Rotary cutter and ruler
- Fabric scissors
- Sewing supplies
- Sewing machine
Skills Learned:
- Straight stitch
- Back stitch – Do this at the beginning and end of each stitch run
- ¼” Seam Allowance (SA)
- Pressing seams
- Working with batting
- quilting
- Using a rotary cutter and ruler
- Right Sides (RST) and Wrong Sides (WST)
Instructions:
Main Fabric:
- Thinking about colour and texture and what goes well together, gather scraps of fabric and cut into 2 1/2” strips using a rotary cutter.
- Press each piece (you can use a fabric spray here for a firmer effect).
- Begin sewing 2 1/2” pieces together using a ¼” SA. Ideally you want to end up with 6-2 1/2” strips that measure around 18” long each (could be made up of multiple pieces sewn together with a ¼” SA along the short end).
- Taking each strip, you will begin to sew one to the other along the long end using a ¼” SA so that you end up with a piece that measures 18×12” when all sewn together.
- Press your seam allowances flat to one side or the other. I usually see which way the fabric wants to lay, or press it toward the darker piece of fabric so that no patterns show through the lighter fabric.
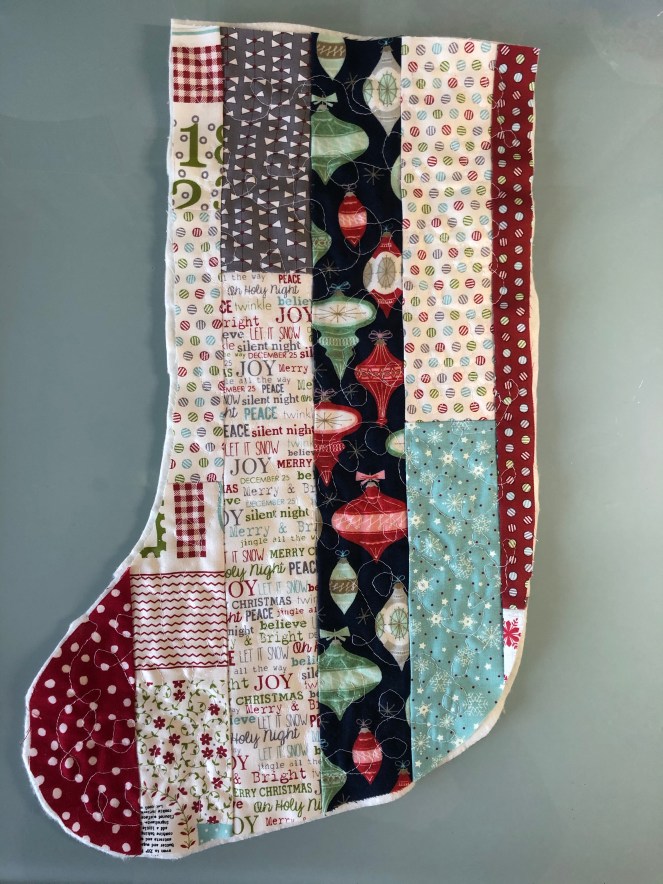
- Repeat steps 3 and 4 so you have two pieces of mix and matched strips. This will become the front and the back of the stocking.
- Take your two main fabric pieces (front and back) and place RST.
- Using your stocking shaped template, place and pin it to the top of your two pieces (it will be on the WS, but facing up.
- Using fabric scissors or a rotary cutter, cut out your shape. You could also trace it using a fabric marker and then remove the pattern and cut it out.

Lining:
- Repeat steps 7-9 with the two pieces of lining fabric; RST and placing the paper pattern on top and cutting it out.
- Using a scant larger than ¼” stitch, sew your two pieces of lining RST (Backstitch beginning and end). Make sure you leave the top of the stocking open (where you would put your foot in if it was a real pair of socks). Set aside.

Quilting the Front and Back of Exterior (Main Fabric):
- Cut out two pieces of batting a little bit larger than your template
- Pin your main quilted pieces (front and back) to the individual pieces of batting and quilt using your walking foot. You can do any type of design here or use free motion quilting with your free motion foot (don’t forget to lower your feed dogs when using your free motion foot).
- Trim off the excess batting around the main fabric pieces.
- Sew the main fabric pieces RST, using a ¼” SA, leaving the top open as you did with the lining. A walking foot will be helpful here. Don’t forget to backstitch at the beginning and end.
Top stocking (Accent):
- Take your 6 1/2” x 15 1/2” rectangle of accent fabric and fold it in half (short ends together) and stitch at ¼” to attach (backstitch at the start and end of your stitching). You will have a tube. Fold the tube in half long-wise and press.
- Cut your ribbon to 8” in length.
Putting it all together:
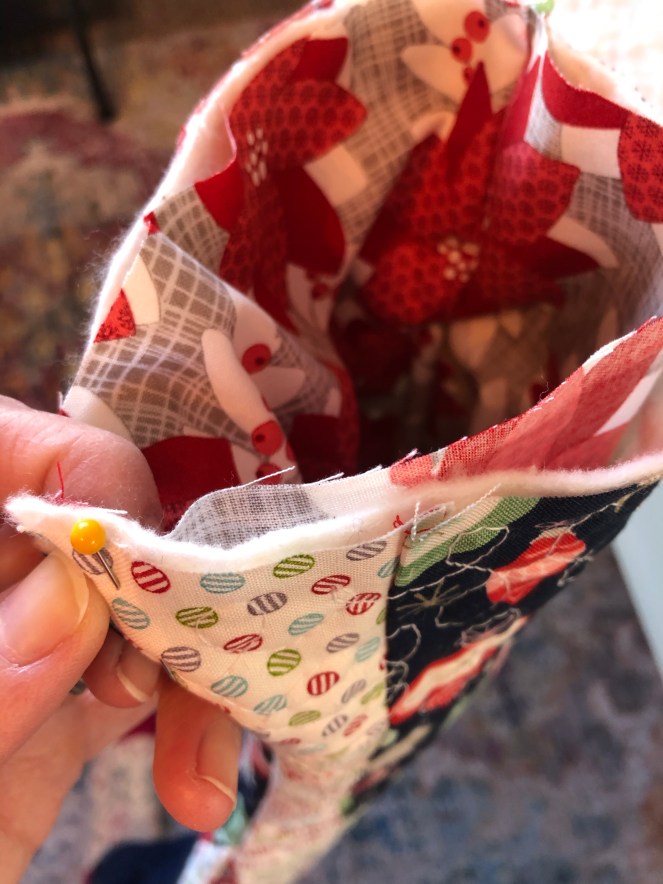
- Take your lining fabric (inside out) and place it inside the quilted main fabric (right side out). You should be able to see your lining inside your stocking and the wrong side of the lining will face the wrong side of the main fabric. Line up your stitch lines at each end.
- Place your top stocking accent piece of fabric inside the lining piece with the raw edges all facing up to the opening at the top of the stocking (the same way). You can pin all three layers together here if it is easier.
- Take your ribbon and fold it in half length-wise and tuck it down in-between your top stocking accent piece and the lining at the back of the stocking with the cut ends facing up and lining up with your layers. Pin it in place and make sure that the top of the loop is out of the way from where you will be stitching.
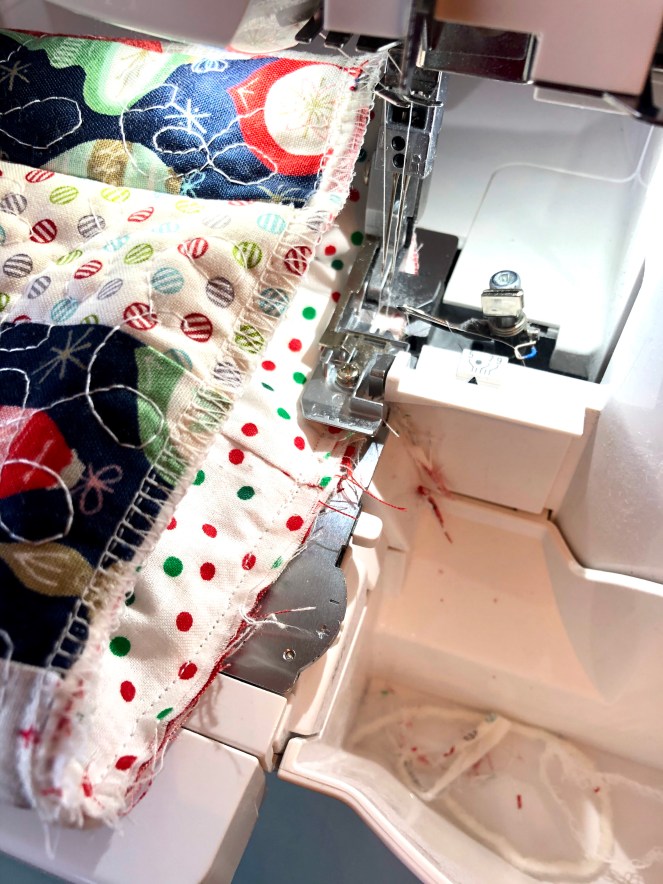
- Stitch ¼” all the way around the top of the stocking, making sure you have the lining, ribbon, top accent piece and main quilted exterior in the stitch. Again, a walking foot is helpful here. If you are planning to stuff it with anything heavy, you might want to reinforce the area where the ribbon is with some extra backstitching.
- Overlock this stitch or cross-stitch to make it look a bit neater. It will be hidden when you fold out the top, but it is always nice to have a more finished look.
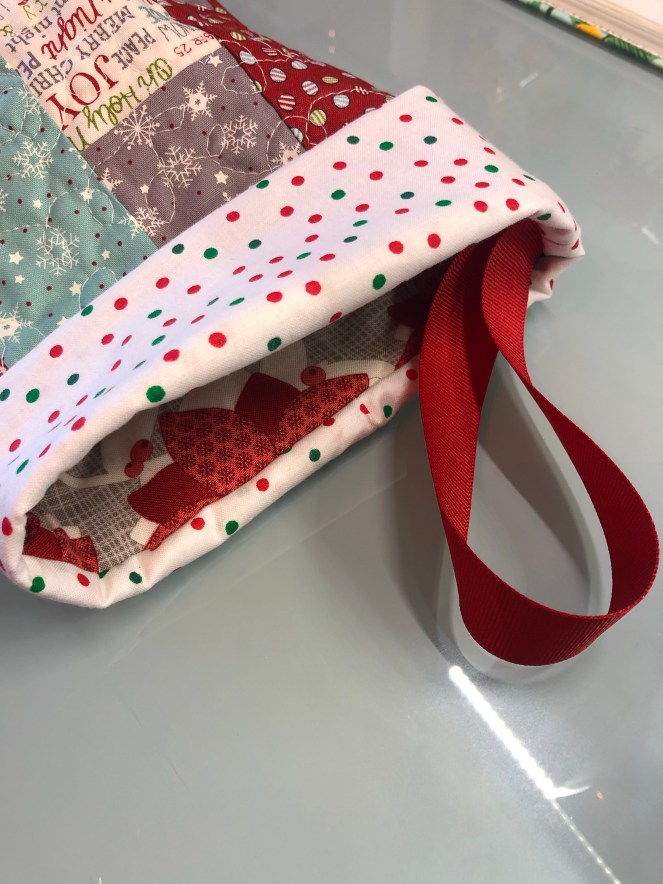
- Fold out your top accent piece over the stocking top and pull out your loop.
- Voila! You have a beautifully crafted and hand-made stocking ready to hang or give as gift!
Happy Christmas and Happy Sewing!
